
- Видео 45
- Просмотров 1 085 807
PrintsLeo3D
Добавлен 9 апр 2021
A 3D printer for beginners and experts!
Are you new to 3d printing and looking for a good beginner 3d printer? Want something that can compete with the BambuLabs series of printers? The Qidi Q1 Pro might be a great option! This fast Klipper based 3d printer has a webcam, is enclosed, and can print any type of filament. In this video we go over the benefits and some sour spots of this printer. If you have questions please leave a comment.
Get the Qidi Q1 Pro Now!
qidi3d.com/products/q1-pro?sca_ref=5812717.3quDPnQGkN
Mandic Labs Qidi Q1 Pro Heater video:
ruclips.net/video/LrkY8-IIHYQ/видео.htmlsi=wNAHsLimYC5pSih0
Channel that first found the heater issues:
www.youtube.com/@Vector3DP
Get your Project jumpstarted with PCBWay:
www.pcbway.co...
Просмотров: 4 680
Видео


Kingroon KLP1 - Step into Klipper !!
Просмотров 2,8 тыс.7 месяцев назад
Looking for a fast 3d printer that can print PLA, PETG, ABS, and more? Are you interested in Klipper firmware and seeing what it can offer? Are you working within budget, and looking for an inexpensive 3d printer? The Kingroon KLP1 may be of interest to you! At first glance this machine seemed simple to me, but I was impressed by how well it printer, and how reliable it was. Find out what all i...
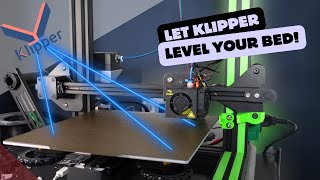
Let Klipper level your bed with the built-in tool screws_tilt_adjust
Просмотров 114 тыс.8 месяцев назад
Learn how Klipper can help you manually adjust your bed level by using the powerful routine screws_tilt_adjust. Are you having a hard time leveling your bed? Are your prints not sticking to the bed? Are you running into a lot of print failures? Well, Klipper can help you save time and save headaches with a simple to implement feature. It may have an odd sounding name, but this built-in Klipper ...

Qidi X-Max 3 review. A big build volume enclosed 3d printer
Просмотров 18 тыс.9 месяцев назад
The Qidi X-Max3 is a fast core XY printer that can compete, and possibly surpass, the Bambu Labs X1 and P1P series. In this video I look over the Xmax3’s features (including the addition of Klipper firmware), as well as some of the drawbacks (like the low included internal memory). Are you looking for a large build volume printer, that can produce fast prints, print at a high temperature, and i...

Slice Print Review: The Cetus 2 3D Printer! Is this the answer to multicolor 3d printin?
Просмотров 2,7 тыс.11 месяцев назад
Are multi-colored prints possible without creating waste? The Cetus2 is trying to answer that question. This is a review of my experience printing with this machine. Buy the Cetus 2 from Tiertime : s.zbanx.com/r/Xee6zyPJlo67 Discount code: Auto 15%OFF Like what you see and want to help the channel grow! Join my Patreon www.patreon.com/PrintsLeo3D °°°Join the Discord °°°° discord.gg/dfgzcUVqMj F...

Pressure Advance Calibration for your 3d printer (Klipper)
Просмотров 78 тыс.Год назад
Learn how to calibrate pressure advance for your 3d printer running Klipper firmware! Pressure advance, in my opinion, is an essential calibration for any 3d printer running Klipper! This can help get better quality prints, create models that are more dimensionally accurate, and help turn bad looking prints into prints that look great! In this video I show one method to calibrate pressure advan...

Longer LK4 X Assemble, Review, and Giveaway! Found out how this printer can be yours!
Просмотров 1 тыс.Год назад
Unbox, assemble, and review of the Longer LK4 X ..oh and also a giveaway!!!! In this video I go through the steps to set this printer up, look at components that need to be improved, and show off features that are improved when updating to Klipper firmware. If you're thinking about buying this printer please consider two things: 1) using my affiliate link for purchase 2) I only had a limited ti...
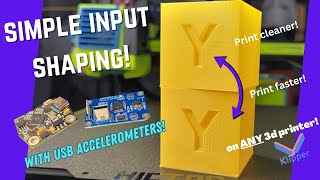
Input Shaping Made easy with a USB accelerometer!
Просмотров 75 тыс.Год назад
Input Shaping Made easy with a USB accelerometer!

Belt Driven Z Axis for the Ender 3 and Aquila style printers!
Просмотров 82 тыс.Год назад
Belt Driven Z Axis for the Ender 3 and Aquila style printers!
BL Touch complete setup for Klipper! Maximize your probed bed mesh!
Просмотров 149 тыс.Год назад
BL Touch complete setup for Klipper! Maximize your probed bed mesh!
Inexpensive answer to running Klipper and Learn how to create a multi-Klipper setup
Просмотров 23 тыс.Год назад
Inexpensive answer to running Klipper and Learn how to create a multi-Klipper setup
Installing Klipper on the Voxelab Aquila
Просмотров 33 тыс.Год назад
Installing Klipper on the Voxelab Aquila
Dual Z Axis Installation with Timing Belt
Просмотров 6 тыс.Год назад
Dual Z Axis Installation with Timing Belt
Direct Drive Voxelab Aquila with the Creality Sprite Pro
Просмотров 18 тыс.Год назад
Direct Drive Voxelab Aquila with the Creality Sprite Pro
Dual Z axis on the Voxelab Aquila with Dual stepper Motors!
Просмотров 4,9 тыс.2 года назад
Dual Z axis on the Voxelab Aquila with Dual stepper Motors!
Print High Temperatures on the Voxelab Aquila with a new Heatbreak!
Просмотров 4,1 тыс.2 года назад
Print High Temperatures on the Voxelab Aquila with a new Heatbreak!
Intro to Cura Print Settings for Voxelab Aquila (Part2)
Просмотров 14 тыс.2 года назад
Intro to Cura Print Settings for Voxelab Aquila (Part2)
Introduction to Cura and setup Voxelab Aquila (Part 1)
Просмотров 40 тыс.2 года назад
Introduction to Cura and setup Voxelab Aquila (Part 1)
Voxelab Aquila S2 - Direct Drive - High Temperature Prints
Просмотров 9 тыс.2 года назад
Voxelab Aquila S2 - Direct Drive - High Temperature Prints
Eryone ER20 Unbox Assembly and First Print
Просмотров 2,9 тыс.2 года назад
Eryone ER20 Unbox Assembly and First Print
Voxelab Aquila BLTouch and Firmware Install
Просмотров 58 тыс.2 года назад
Voxelab Aquila BLTouch and Firmware Install
PEI Flexible Bed for the Voxelab Aquila | Ender 3
Просмотров 4,9 тыс.2 года назад
PEI Flexible Bed for the Voxelab Aquila | Ender 3
Voxelab Aquila Bed Level and Z Offset Adjust
Просмотров 40 тыс.3 года назад
Voxelab Aquila Bed Level and Z Offset Adjust
Jayo S8 Plus - Unbox, Assembly, First Print | Sunlu S8 Plus
Просмотров 6 тыс.3 года назад
Jayo S8 Plus - Unbox, Assembly, First Print | Sunlu S8 Plus
Dual Gear Extruder | BMG Extruder Upgrade Voxelab Aquila
Просмотров 39 тыс.3 года назад
Dual Gear Extruder | BMG Extruder Upgrade Voxelab Aquila
Voxelab Aquila Assembly and Unbox Part 2
Просмотров 1 тыс.3 года назад
Voxelab Aquila Assembly and Unbox Part 2
This is the guide I always go after tweaking something in my Ender 3, thank you so much!!
Oh wow that's awesome to hear, thank you!! These videos take me a lot of time to make and whenever anyone leaves a comment like thiabit truly means the world to me. Thank you!
Thanks so much I’ve just subscribed this is the best summary of the whole z offset process I’ve seen . You have a talent for making complex things less . Einstein would be proud :)) I’ve had an ended s1 pro for a few years with kipper and I’m off tomorrow to install the adaptive bee mesh Kamp see how that goes !! Thanks again
Thank you so much, you're too kind!! If my videos can help people better understand Klipper and get the most out of it then I am a happy man! I appreciate you taking time to leave a comment and let me know how this helped! I really appreciate it!
Wow, finally.. finally... finally managed to configure my BL touch on my Ender 5 Pro to its best. Thanks!
So happy to hear it! Now it's time to enjoy that printer!
Or.... just get a CR Touch LoL
I'm not sure what part of the video you're referring to, but this modification does much more than adding a bed probe. This will turn a Bowden style system into a direct extrusion system, which can then be equipped with a bed probe.
the website says the hotend goes to 350c?
It does in fact have a max temp of 350c. I never got a chance to print any materials at that temp though as I only have nylon on the higher temp end.
@@PrintsLeo3D lol ok i got confused cause the screen said 250c lol
@hasanmich1504 my apologies, I was probably running a petg or ASA print
The BEST tutorial on how to set up BL/CR Touch for Klipper! After I set the Z Offset then did multiple bed mesh levels adjusting my bed till I was happy with it. I had Zero need to do a live Z Offset! Bed level print came out beautiful! Thank you!
Thank you so much!!!! And thanks for taking the time to leave a comment, makes my day!
I implemented this as soon as I upgraded my CR-10 v2 to Klipper. It's a great feature making tramming the bed so much easier and faster.
Yea this is one of those small additions that can make a huge quality of life difference. I appreciate you leaving a comment !
Yooooooo thank you mine was at 67mm when I was trying to get 100mm this literally solved all my problems thank you so much ❤❤❤❤❤
Welcome!!! These small calibrations are what play a huge role in our overall print quality, and I'm glad this video was able to get you there! Cheers!
you are the best. thank you
Thank you!!! Comments like this are what motivates me to keep making more videos!
Great vid, thanks, did want to note printers like the Neptune Max have the center bed (home) as the main reference, not screw 1.
Thanks sm I appreciate it! I know there have been a lot of users with Elegoo machines that have helped contribute to this video by leaving helpful comments like this. So thank you and everyone else who helps make this video and comment section informatibe.
Where can I get a replacement bed sheet? The nozzle gouged it trying to print the first print after leveling.
It will depend on what printer you have. Most printer manufacturers will sell new bed sheets direct from their website. You can also find comparable or even better bed sheets from third party companies through Amazon or AliExpress. Just make sure you get the correct size for your bed.
I didn't find this start print and end print macro in my klipper, how do I make it appear?
Printer configuration files don't come with start and end print macros by default. You can usually find a very bare bones start and print macro on the internet and then add or adjust them to suit your printer needs. Such as proving before each print, or using mesh probing, making adjustments like that. If you go to my website printsleo3d.com there are some basic start and print macros under my Klipper tab.
Printer configuration files don't come with start and end print macros by default. You can usually find a very bare bones start and print macro on the internet and then add or adjust them to suit your printer needs. Such as proving before each print, or using mesh probing, making adjustments like that. If you go to my website printsleo3d.com there are some basic start and print macros under my Klipper tab.
@@PrintsLeo3D ok thank you!!
@EBIKESBR anytime! Let me know if you need more help
Hey, I love your tutorials. You are great in simplifying the information. Can u do a guide on z-tilt too? I have and Ender 3 with KevinAKaSam Dual Z belted mod, he was encouraging it's use in one of our brief chat but I can't find a good guide here on YT. I only learned to 3D print the past 6 weeks and the learning curve is quite steep. Thanks!
Z tilt was a topic that I was looking forward to covering. My T500 makes great use of z_tilt with its huge bed so I was thinking of using that as a focus.
@@PrintsLeo3D looking forward to it. :)
Awesome videos! Should I do: "BL Touch complete setup for Klipper! Maximize your probed bed mesh!" or this video first?
Thanks! The BL touch video is long, but it's where I would recommend to start. It goes over how to make sure your bl touch is setup correctly which is the baseline for a lot of these calibrations.
@@PrintsLeo3D good to know, I'll start with that video, and then follow up with this one. Thanks for the help ❤
@Juan-um7du happy to help!
Thanks! This video solved questions I did not even know I had!!! Very informative!!!
Glad this was informative. PEI and some variants have come such a long way since this video that it's probably time I did a little update! Thanks for the comment and for watching!
Speak slower pleaseseeee but great video
I really try. My natural cadence is very fast, so I am very mindful of slowing down. When I get excited or really I tk a topic I tend to forget about that and just blaze forward. I appreciate the feedback
@@PrintsLeo3D I wrote the comment in the first couple of minutes, but i must say, very good video. Didn't think you would go so in depth.
@viktorbrasse1920 thank you very much! I try and dive into these sort of necessary but mundane topics to try and flesh them out for people a little better. I appreciate it!
FYI - I bought this printer on July 10th in the US and my printer did come with the ethernet port, and it did work! WiFi works as well.
Woah really! I had emailed them so long ago about it and they never responded with what their plans for it would be. It seemed like an odd omission , glad it's been added.
Any ideas of what I could do it I can’t mount things onto my walls?
Are you looking for a storage system on the ground? I know people love using those large plastic containers/tubs to store filament and use as a dehumidifier.
It can print PPS at up to 350 C, which is better than any printer in this price range on the market and even better than some of the higher end ones.
You are absolutely right. The ability to reach such temps is really unmatched by others in this same market share. I will say I never really got a chance to test this long term, as I didn't have any filaments that would take such high temps.
thanks for this tutorial - very well made, super clear, got it working the first try (troubleshooting sections are a nice touch too)
Thanks for the feedback! Getting a camera going to watch your printer is a game changer, and opens you up to some more features (like failure detection) , so I'm happy to be able to help get this running!
Been printing for almost 2 years, i pretty much just level the bed by sight, and i get pretty good results every time
The more you are in the hobby the easier and quicker a lot of the calibrations becomes, even second nature sometimes. It's always great to start with a great baseline and some baseline methods so if and when you do jump to a new machine you have a process that you know works for you. Great to hear it's working for you !
AWESOME ITEMS
Thank you!!!
WHAT ARE YOU TEMPERATURE SETTINGS
For PLA I think I a running around 235c, and bed is at 55c
Did you have any luck getting klipper on the R1 ? I bought one and would like to try it.
Unfortunately no. It was mainly a time issue. I just didn't have the time to invest into thr project.
This is a great tutorial and I had such high hopes for thisas I followed along - but I hit a wall when I was calibrating the mesh and got the dreaded {"code":"key243","msg":"Move out of range: 234.000 50.000 5.000 [0.000]", "values":[234.000, 50.000, 5.000, 0.000]} while it still had plenty of room to go on both x and y. so back to square one I guess.
Sorry it's taking me so long to answer this, are you still running into an issue ?
i got my corners all down to 1 minute except one side which i got 2 on using this video with a tolerance of .140. thank you!!!
Those times are awesome! Good luck and happy printing!
I wish all your dreams to come true, thanks for the video
Thank you so much, that's so kind.
So how much faster is it with these modifications compared to a stock Ender 3?
The speed really doesn't change from modifications like this. The biggest thing you can do to increase the speed of your printer is to move over to Klipper firmware (if you haven't done so already).
Would it be possible to run the code used here without the klipper environment by inputting your mesh results 'manually' each time you run it?
I'm not too sure what you're asking. Using a non Klipper environment (like Marlin) they have the ability to direct your print head and probe to exact locations in series. Which would allow you to adjust each corner. Having the probe take results and give you realtime data might be a bottleneck there but I'm sure if you spent enough time you could make it work.
Excellent video, can you make a video showing how to configure an inductive sensor in Klipper? please
Adding it to the list! Thank you so much!
Hey i know that this is an old video but I was looking for some help. I'm at the part of installing klipper with KIAUH but it is stuck. In the video you mentioned that it took 17 minutes but mine has been stuck at the line "unpacking libnewlib-arm-none-eabi (3.3.0-1.3)..." for the last 45 minutes or so. Have I done something wrong? How can I get around this? Any help is appreciated.
I've never ran into this issue myself. I would ask what OS you are using and what pi?
@@PrintsLeo3D I'm using a RPi zero 2 w and I am doing this on a Windows laptop. I know that the RPi is not overheating or anything and it has power and all that. I can't think of anything that would cause this. It is a brand new pi, literally opened the amazon package 4 hour ago. Edit: also it still hasn't made any progress after 2 hours
@@PrintsLeo3D Is it possible for me to stop it and just start over? I don't want to unplug it or close the program and damage it in the same sense that you don't just pull a sd/usb out of a computer without ejecting it. Is there a way for me to stop it without damaging the system?
Thank you for this informational video. I had one problem that got solved i thought i share. When flashing with command: "stm32flash -w out/klipper.bin -v -g 0 /dev/ttyUSB0" It failed saying "Wrote and verified address 0x08000300 (0.94%) Failed to read memory at address 0x08000300" on and on again at different %. Tried to plug the usb flash device directly to the pi without hub, usb extention cable. Also in usb 2 instead of usb 3 port. Same fail results. All worked when removed the "-v" command from the line like this: "stm32flash -w out/klipper.bin -g 0 /dev/ttyUSB0" It dont verify i guess but write the firmware and all done, works.🙂 Another thing. Please add your inputshaper.cfg lines in the description or a link to your site with it or something would be awesome😀
Thanks for the detailed comment. I thought I had my website linked in the description, but I wouldn't doubt that I forget it as on oversight as well lol I'll look through it now and add it , thanks!!
Leo... EXCELLENT presentation. I've struggled with flow rates on my new Sovol Klipper and your video has been a game changer! Thank you.
Thanks!
Excellent tutorial. That being said, do you think it's worth the hassle or should I just go buy a nicer printer? Right now I've got a basic Ender 3 with BL Touch running Marlin FW
el mio quedo mal de principio a fin
this is the most useful and detailed tutorial with out unnecessary BS that I have came across, THANK YOU.
I have an Elegoo 4 pro. I don't have the "Tools" menu to the right of the "Motors off" menu. Is there a way to add this Meny to the printer.cfg?
Your videos are fantastic. I find that after watching your videos on a specific topic, I don't need to consult any other sources online. Your Klipper videos are reminiscent of Joshua Bardwell's FPV videos. Keep up the excellent work!
welp, this is my sign to install klipper on a tv box running armbian.
did he just say "hay nako?" 🤣🤣🤣
Amazing video!
You think this can be done with the Microswiss NG?
Thank you!
I have an Aquila Pro, Can I use the same cura profile? is it just the build size that changes for me?
This is quite a review, I should say! I think belts are better than installing the second spindle. Next you should install additional interchangeable hotends to the top, and print in multicolor or multimaterial = )) Belt will allow quickly move carret to the top, switch the toolhead and get back to print. = ) I hope that Creality Ender 3 V3 created because of this idea, but who knows, will they do this, or not. Practice shows that printer producers takes ideas from community = )
Great lesson
Thanks for the video. Is there a screen option to keep it in landscape orientation?
Thanks man!! this was a huge improvement to my set up on an Ender 3S1 and 3 v2. Awsome content!
Would I really want to throw to garbage such a huge print due to such layer inconsistency? 12:51